How to Revive a Dried Sourdough Starter: A Guide
In this guide, I’ll walk you through step by step how to revive a dried sourdough starter and help you bring it back to life!

Sourdough is my bread of choice for many reasons. Though many feel it is complex, once you get the hang of it, it truly is a simple way to make bread. Sourdough starters are a necessary component to make naturally leavened bread. But what happens if your starter has been stored in a dehydrated state for long-term storage or you forgot about it and it went crusty? The good news is that reviving a dried sourdough starter is a simple process that requires just a little patience.
What is the Difference Between an Active Starter and a Dry Starter?
An active starter and a dry starter differ in their hydration, activity level, and storage method. Here’s a breakdown of the key differences:
Active Starter
- Hydration: Contains water and flour in a thick, paste-like consistency.
- Activity: Bubbly, rising, and falling with regular feedings. The wild yeast and lactic acid bacteria are actively fermenting.
- Usage: Ready to be used for baking sourdough bread and other recipes.
- Storage: Kept at room temperature with daily feedings or stored in the refrigerator and fed weekly.
Dry Starter (Sourdough Starter in Dried Form)
- Hydration: In a dried, shelf-stable form, lacking moisture.
- Activity: Dormant; wild yeast and bacteria are inactive until rehydrated.
- Usage: Needs to be revived before use.
- Storage: Can be stored in an airtight container in a cool, dry place for long-term storage (months or even years).
A dry sourdough starter is a great way to preserve your culture for long periods, while an active starter is necessary for baking. If you plan to bake regularly, keeping an active starter is best. If you want a long-term backup, drying your starter is a good idea!


Time Required to Revive a Dried Sourdough Starter
Rehydrating a dried sourdough starter can take anywhere from 2-3 days to a week, depending on various factors such as ambient temperature, hydration level, and the strength of the original starter. Typically, you’ll begin to see signs of life within 12-24 hours after the first feeding, and by 24-48 hours, small bubbles should form, indicating that the wild yeast and lactic acid bacteria are becoming active again. Warmer temperatures help speed up the process, while cooler environments may require a bit more time.
Materials Needed
Before you begin, gather the following materials to ensure a smooth feeding process:
- Glass jar or mason jar (it should be a clean jar) with a loose-fitting lid or cloth cover
- Rubber band (to mark the starter’s growth)
- Bowl scraper or spoon for mixing (here is the kind I like)
- Kitchen scale (forgot to picture here)

Ingredients to Revive Sourdough Starter
To reactivate your dormant dehydrated sourdough starter, you will need:
- 10 g dried sourdough starter
- 100 g water (preferably warm)
- 75 g flour (you will need more the more feedings you do)

Easy Steps to Reactivate a Dehydrated Sourdough Starter
Follow this step-by-step guide to revive your dehydrated starter successfully. Note that it may take a couple of days to get going again.
Rehydrate the Dry Sourdough Starter
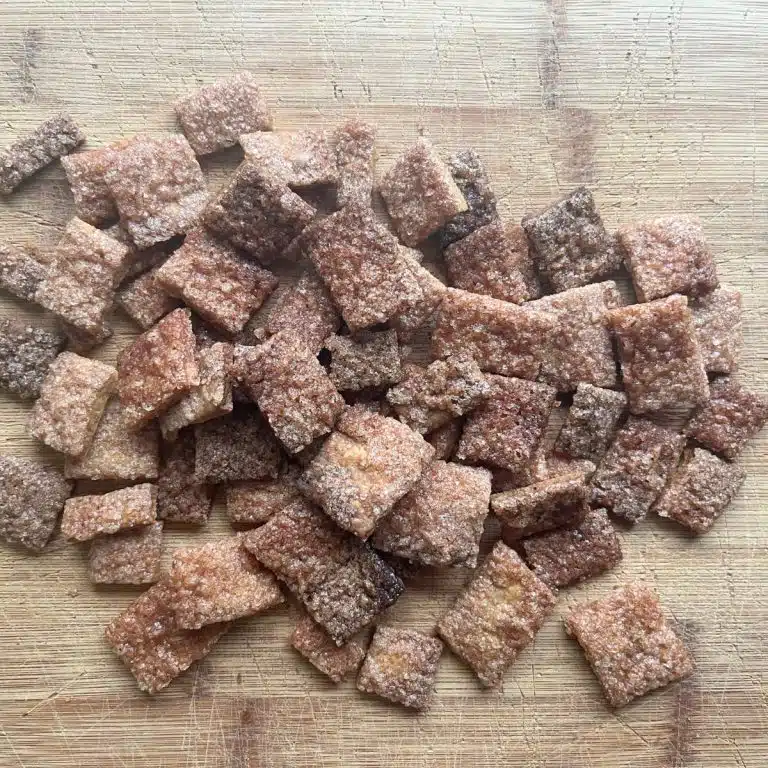
- Place the dried sourdough chips of dried starter into a clean jar (10 g starter).
- Add warm water (about 25 g) and let it sit for 12-24 hours in a warm location to soften.
- Stir occasionally to help dissolve the dried starter. This is the best way to ensure even hydration.

First Feeding
- The next morning (or after 12-24 hours), add equal parts (by weight) of fresh flour and filtered water (25 g each) to the mixture.
- Mix well and cover loosely with a lid or cloth.
- Store in a warm place (75-80°F is ideal) for 12-24 hours.

Second Feeding
- After 12-24 hours, discard about a portion of the mixture (save this!) and mix 25 g of the starter with 25 g each of fresh flour and filtered water. You also have the option not to discard this and just use the amount that is already in the jar (might be about 75 grams). If so, then you’d mix 75 g flour and 75 g water. Whatever you choose, always use a 1:1:1 ratio when rehydrating for simplicity. Stir well until you get consistency in the pancake batter.
- Mark the jar with a rubber band and place a lid or cover on loosely.

Continue the Feeding Process
- Feed every 12-24 hours for the next 2-4 days. It may take longer, but within 4 days you should be seeing signs of life.
- Look for the starter to double in size within 4-6 hours after a feeding.
- If it takes a long time to rise, move it to a warmer temperature or try using rye flour.
- Your should have a bubbly starter and a pleasantly sour smell.

When to Start Discarding
You’ll want to start discarding after the first few feedings, usually by the second feeding. Discarding helps prevent the starter from becoming too large and ensures that the wild yeast and lactic acid bacteria stay balanced. A good idea is to save the discard for making sourdough discard recipes.
What to Do with Sourdough Discard
Here are some ideas for using up the discard!
No Baking Soda Sourdough Discard Cookies
Temperature of Starter
Maintaining a warm environment is crucial for reactivating a healthy starter. If your kitchen is cold, find a warm spot, such as:
- Near a warm area like the oven. I just set it near the oven when I am cooking. You could also put it in the oven while turned off, but with the light on. Just don’t forget it’s in there!
- A warm location like the top of your fridge
- Use a proofing box or heating pad (set to low).
Tips to Rehydrate a Sourdough Starter
- Use a glass jar: A mason jar is best because it’s non-reactive, easy to clean, and you can place the lid without the band on top for breathability.
- Choose the right flour: Whole wheat flour or bread flour can help speed up fermentation. Check out my post on the topic of flour.
- Maintain a warm temperature: A temperature around 75-80°F is ideal. Using a bread box is desired.
- Be patient: It can take a few days for a very active sourdough starter to form.
- Give it a good stir: Mix well to distribute yeast and bacteria evenly.
- Mark the jar: Use a rubber band to track the rise of your starter.
- Cover loosely: Prevent fruit flies but allow airflow.
Sourdough Bread Recipes
What’s an active starter without a classic bread recipe!?
Reviving a dehydrated sourdough starter is a simple process that just takes a little love and patience. By following this guide, you’ll have a very active sourdough starter ready to bake delicious bread in no time. If this is your first time reviving a dry-form starter, don’t worry—it gets easier each time.
FAQ’s
How do you refresh a sluggish sourdough starter?
I wrote an article on this topic, but my biggest piece of advice would be to turn up the temperature and/or add some rye flour when feeding. The starter should perk right up!
How do I know if I killed my sourdough starter?
The truth is, you probably did not kill it. I mean, maybe, but many times, it just got neglected and it needs some TLC. However, if there is mold on the starter, I would recommend throwing it out and starting over. You might be able to scrape the mold off, but I don’t know how these things spread, so I prefer to just give it a toss. So try feeding it again and use rye flour as a supplement to get it going if the all-purpose flour doesn’t seem to be working.
How do I wake up my sourdough starter?
Temperature is a big factor in waking up your sourdough starter. So the first thing I would do is be sure it’s not in a cold environment. Take it out of the fridge for a few hours to let it warm up. Once it’s at room temperature, go ahead and feed it. If it doesn’t wake up after the first feeding, feed a few more times with about 12-24 hour in between.


How to Revive a Dried Sourdough Starter
Equipment
- 1 Wooden Spatula (my preference)
- 1 mason jar (or any clean glass jar)
- 1 rubberband (I save my produce rubberbands for this)
Ingredients
- 10 grams of dried sourdough starter about 2 teaspoons
- 100 grams of warm water 25 grams per feeding, you may need more
- 75 grams of flour 25 grams per feeding, you may need more
Instructions
Rehydration
- Place the small pieces of dried starter into a clean jar.10 grams of dried sourdough starter
- Add warm water (about 25 grams) and let it sit for 12-24 hours in a warm location to soften.
- Stir occasionally to help dissolve the dried starter. This is an easy way to ensure even hydration.
First Feeding
- Add equal parts (by weight) of flour and filtered water (25 grams each) to the mixture. You will not discard this round.
- Mix well and cover loosely with a lid or cloth.
- Store in a warm place (75-80°F is ideal) for 24 hours.
Second Feeding
- After 12-24 hours, add 25 grams of the starter, along with equal parts of fresh flour and warm water (25 grams each or a 1:1:1 ratio). Discard the rest of the starter (save it!)
- Stir well and mark the level with a rubber band.
Continue Feeding
- Feed every 12-24 hours for the next 2-4 days.
- Look for the starter to double in size within 4-6 hours after a feeding.
- If it takes a long time to rise, move it to a warmer temperature.
- By the next day, your starter should show strong bubbling and a pleasantly sour smell.